6-String Bass Exercise – Diatonic 7ths with Approach Notes – Bass Practice Diary – 15th December 2020
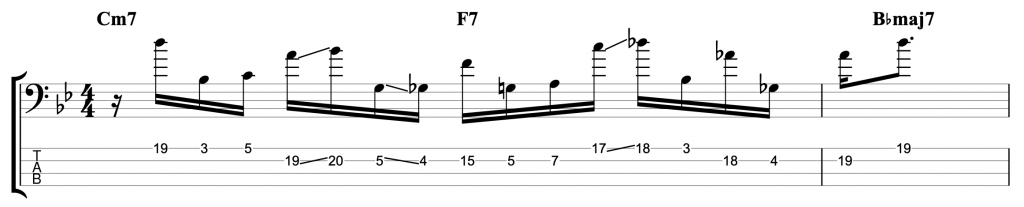
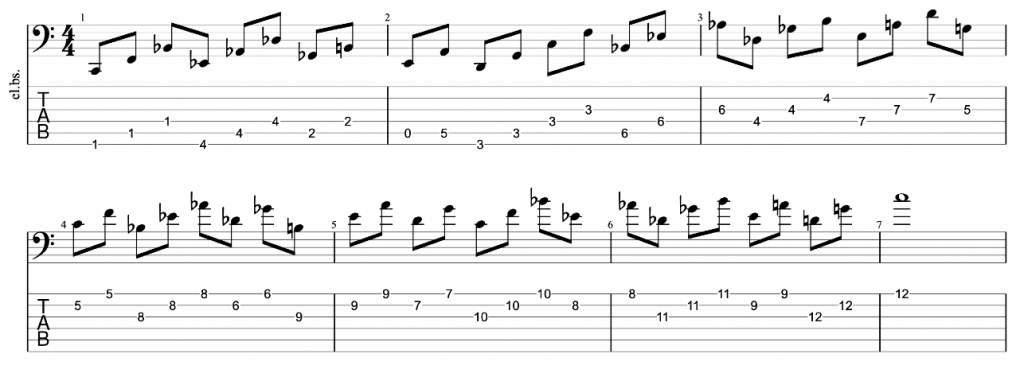
I’ve spoken recently in my Bass Practice Diary videos about how the addition of chromatic approach notes to diatonic exercises can immediately create a jazz sound in your lines. This “approach notes” exercise is a development of that idea. I’ve featured a few 6-string bass exercises in my videos this year. This one involves playing descending diatonic 7th arpeggios, with a chromatic approach note before the start of each four note arpeggio.
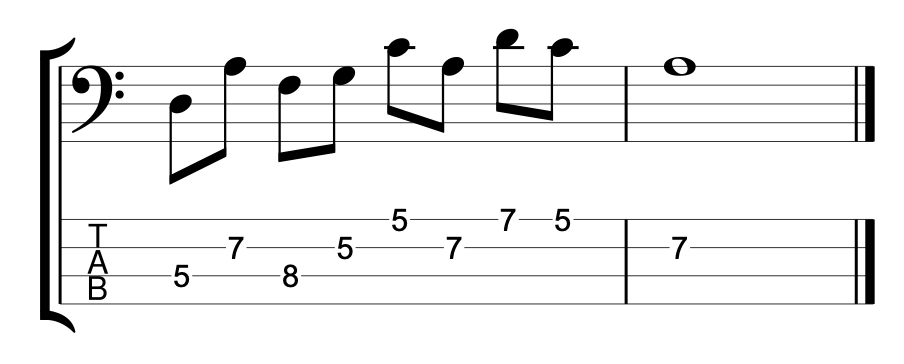
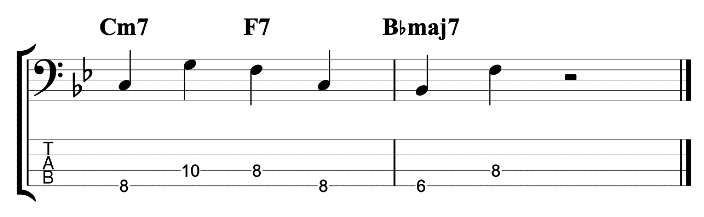
Diatonic 7th Arpeggios
I’ve demonstrated this idea in the key of C major. Because it’s always the easiest key to demonstrate an idea that relates to diatonic harmony. The idea of diatonic 7th chords is simply that you build four note chords by taking the 1st (root), 3rd, 5th & 7th notes of the major scale. You can then repeat this pattern of taking alternate notes, but starting on different degrees of the scale. There are seven different notes in a major scale, hence there are seven different diatonic 7th chords in any major key.
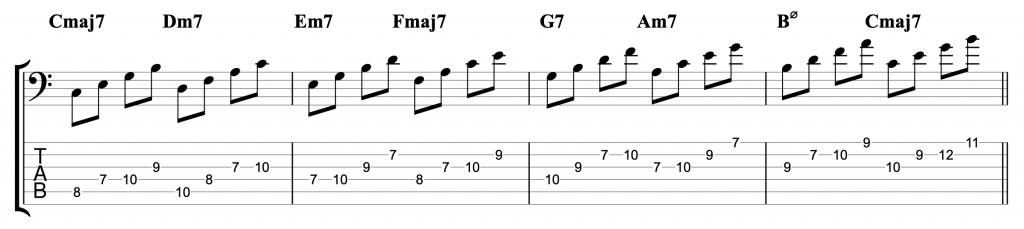
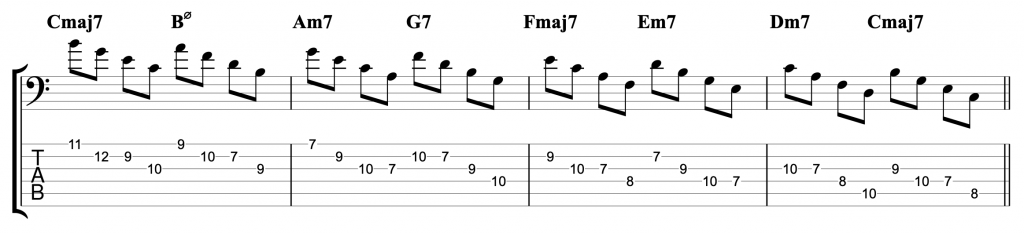
In the example above I’m playing each arpeggio ascending, starting from the root. For the purposes of this exercise I’m playing the arpeggios descending, starting from the 7th and finishing on the root.
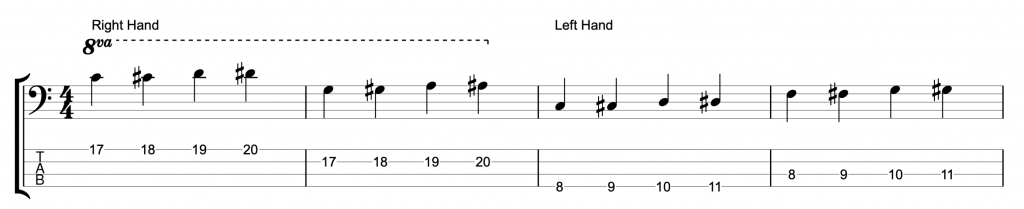
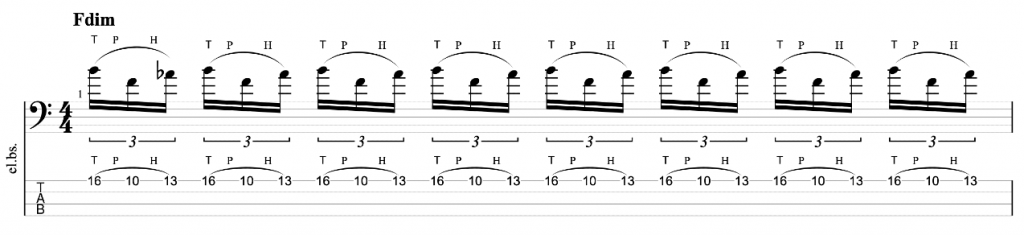
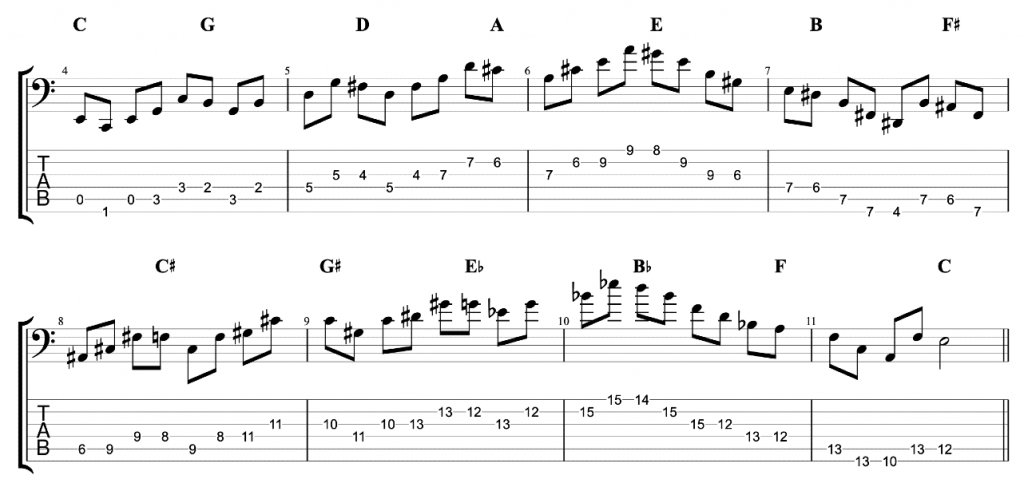
Chromatic Approach Notes
The term chromatic approach note simply means taking a note that is a semi-tone (half tone) away from your target note, either above or below. Then playing the chromatic approach note immediately before you play the target note.
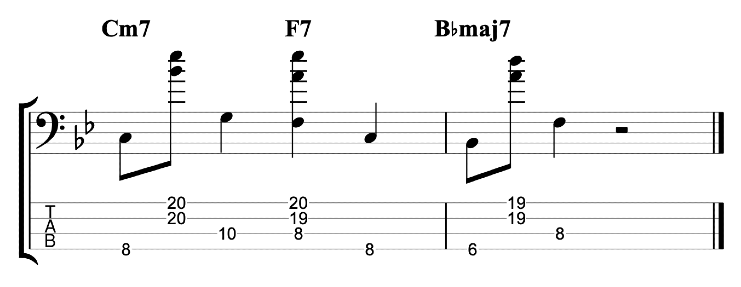
In the case of this exercise, the target note is the 7th of each arpeggio, which is the first note that I’m playing for each one. I’m adding a chromatic approach note before the 7th each time.
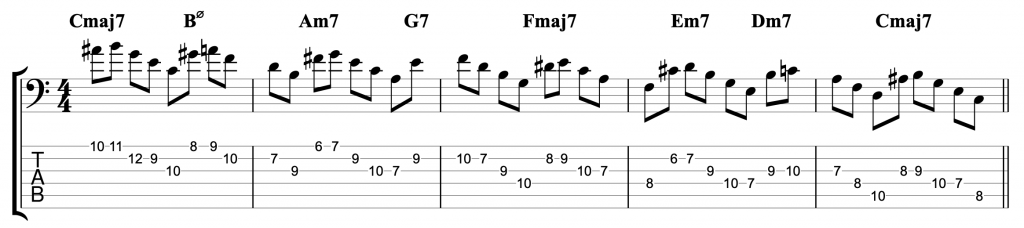
There are two reasons why I’ve done this. One is because the addition of chromatic approach notes creates the sound of a jazz line, as I already mentioned. And the second reason is that it creates an odd number grouping of notes. The four note arpeggios become a five note sequence with the addition of the approach notes. The odd number grouping creates a rhythmic variation that makes this sound less like an exercise and more like a musical line.