8th and 16th Note Bass Lines – Part 2 – Sixteenth Note Bass Grooves

Eighth and Sixteenth Note Bass Grooves

In this video lesson you’ll learn all about sixteenth note bass grooves. How they differ from eighth note grooves and some practical advice for practising them.

What’s the difference between eighth and sixteenth note feels?

I explained in Part 1 of this lesson that when you divide a beat into two, you get an eighth note feel. If you divide each beat and each off-beat into two, so that each beat is divided into four, then you will have a sixteenth note feel.

When you play eighth note grooves, you can place notes either on the beat or off the beat. On Ta or on Ka. When playing sixteenth note grooves you can still place notes on the beat, but there are now three different places where you can place notes off the beat.

There is still a conventional off-beat, as there was with eighth note grooves. This is the point in time exactly equally distant from the beat before and the beat after. However, there are now two other sub-divisions. The first comes between the beat and the off-beat, and the second comes after the off-beat. All four sixteenth note sub-divisions must be equal. None of them is longer or shorter than the others.

Learn to feel all four sixteenth note sub-divisions individually.

In Part 1 I explained that in order to groove in an eighth note feel,  you must feel the beats and the off-beats. So if you want to groove while playing a sixteenth note feel, then you must also feel the other two sixteenth note sub-divisions. And, to have great timing you should be able to accurately place a single note on any sixteenth note sub-divisions.

Each of the four sub-divisions has it’s own unique feel when you place a single note on it. Just as the beat has a very distinct feel from the off-beat. So the other two sixteenth note sub-divisions have their own distinct feel.

How do I improve my sixteenth note groove?

First you need four syllables to represent the four sixteenth note sub-divisions, Ta-Ka-Di-Mi. I used Ta-Ka to represent the beat and off-beat in eighth note grooves. For sixteenth note grooves Ta is the beat, Di is now the off-beat and Ka and Mi represent the additional sixteenth note sub-divisions.

As with eighth note grooves, the key to having great timing is the ability to place a single note very accurately onto a sub-division. If fact that is the key to having great timing no matter what the feel or style of music. So begin by trying the exercise demonstrated in the video. Say Ta-Ka-Di-Mi, making sure you say it in time, with every syllable equal in length. Use a metronome or drum beat to help if you need to. Then try playing a single note on each of the four syllables. First Ta, then Ka, then Di, then Mi. This should help you to experience the different feels of the four sub-division.

Once you’ve done that, try playing this sixteenth note example from the video slowly.

Sixteenth note bass groove
Sixteenth Note Bass Line for Electric Bass

Try reciting Ta-Ka-Di-Mi while you play it, as I’ve demonstrated in the video. Play it as slowly as you need to in order to place all of the notes accurately. Once you can do that, try gradually increasing the tempo. Don’t try playing the example fast until you’ve mastered it slowly.

Why you should always start by practising slowly

A good rule of thumb to remember is this. If you can’t play something in time slowly, your time feel won’t be good when you play faster. I’ve often heard students say that it’s harder to play something slow than fast. It can often feel that way. The reason is that playing something slowly makes all of the little errors of timing very obvious. They’re not so obvious when you play fast. However, if you want to improve your groove, you need to get rid of those little timing errors. Those notes that are placed slightly before or after the sub-division they were meant to be on. And that involves playing very accurately slowly, and then gradually speeding up while maintaining the same levels of accuracy. That’s how you improve your bass groove!

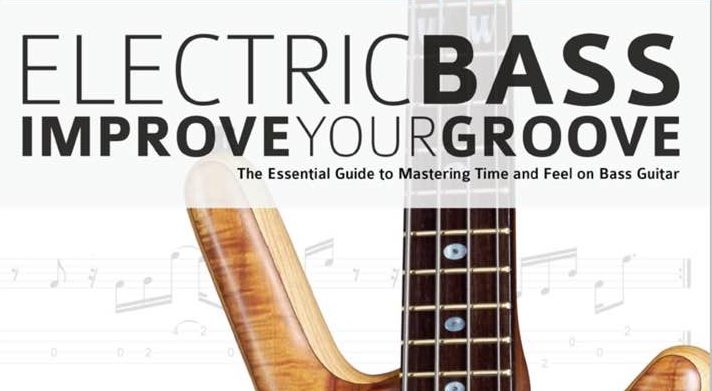
All of the examples in this series of videos come from my book Electric Bass – Improve Your Groove: The Essential Guide to Mastering Time and Feel on Bass Guitar.

3D Cover Image Improve Your Groove
Electric Bass – Improve Your Groove

Click on the link to find the book. https://geni.us/bassgroove.

The book contains over 140  audio examples featuring eighth and sixteenth note grooves in a variety of styles including rock, blues, jazz and latin. It also features sections on syncopation, shuffle feels, triplets and swing. It has practical advice for grooving with drums and sharing a collective time feel in a group. And it features five pieces with play along backing tracks to help you put these ideas into practice.

Happy practising!


8th and 16th Note Bass Lines – Part 1 – Eighth Note Bass Grooves

Eighth Note and Sixteenth Note Bass Grooves

This is an important topic for bass players because most music has either an eighth note or sixteenth note feel. So, every bass player should know when and how to use eighth and sixteenth notes.

What are they and how do I master them on bass?

In this video lesson I’ll demonstrate the difference between bass lines with an eighth and a sixteenth note feel. Then, I’ll explain how to improve your rhythmic accuracy when playing these feels so that you will improve your groove.


First have a look at these two examples from my book Electric Bass – Improve Your Groove: The Essential Guide to Mastering Time and Feel on Bass GuitarFind the book by following this link.

https://geni.us/bassgroove

Eighth Note Example
Bass line with an eighth note Feel
Eighth Note Bass Line for Electric Bass
Sixteenth Note Example
Bass line with a 16th note feel
Sixteenth Note Bass Line for Electric Bass

Listen to both examples either by watching the video or by using the Mp3 audio tracks that accompany the book. It’s so important to listen to the examples as well as reading them. If you only read them without listening then you’re only getting half the story.

The first thing that I want you to notice about these examples is that they’re quite similar. The speed and chord progression are the same and they contain mostly the same notes. I deliberately wrote them that way because I wanted the only difference to be the rhythmic feel. The first example has an eighth note feel and the second has a sixteenth note feel.

What is an eighth note feel?

An eighth note feel means that every beat is divided into two. So each beat contains a beat and an off-beat.

The off-beat is the point in time exactly equally distant from the beat before and the beat after. The eighth note example above has four beats in each bar so there are four beats and four off-beats in each bar. Therefore there are eight different places in each bar where you can place a note either on the beat or off the beat. Hence it is called an eighth note feel.

It can only be called an eighth note feel if all the notes are placed on either beats or off-beats. If a note is placed on any other sub-division then it’s no longer an eighth note feel.

An eighth note feel does not mean that you have to play eight notes in every bar on all of the eight sub-divisions. It means that all of the notes that you play are placed on either beats or off-beats.

How do I improve my eighth note groove?

In most cases when you’re playing an eighth note feel, you’ll play with an eighth note drum beat. Meaning that the drums are playing the eighth note sub-division. If you want your bass line to groove you need to make sure your notes sit very accurately in time with the drummers sub-divisions.

However, you should also be able to groove playing eighth notes even when you’re not playing with a drum beat. In order to improve your eighth note grooves you need to have a system for feeling the eighth note sub-division when you play.

My system involves using the syllables Ta-Ka. Using this system Ta represents the beat and Ka represents the off-beat. Recite Ta-Ka four times making sure that every syllable has equal length, Ta-Ka / Ta-Ka / Ta-Ka / Ta-Ka. This represents one bar of eighth notes. Four Ta‘s represent the four beats and four Ka‘s represent the four off-beats. Try reciting the Ta-Ka‘s in time with the audio example in the video (you’ll find it at 1m52s). If you can do that and keep it in time, then you are feeling the eighth note sub-division.

How should I practise to improve my eighth note feel?

You will improve your eighth note bass grooves by playing off-beats very accurately. I hear a lot of bass players who play on the beat very well, but they seem to guess where the off-beat is. They play it either too early or too late.

The key to having great timing is the ability to place a single note very accurately onto a sub-division.  Practise this by first placing a note just on the beats (Ta‘s) and then just on the off-beats (Ka‘s). I’ve demonstrated this in the video. If you’re struggling to keep in time while you do this, make sure you practise it slowly in time with  either a metronome or drum beat.

In order to play eighth note grooves really well, you first need to feel the beats and the off-beats and you need to be aware of which notes land on the beats and which land on the off-beats. Then you need to make sure that the notes on the beats land perfectly on the Ta syllables and the notes on the off-beats land perfectly on the Ka syllables. If you do that, your bass groove will be superb when playing eighth notes either with or without a drum beat.

What About Sixteenth Note Grooves?

Please continue to Part 2 of this lesson, you can find it using the link below. In Part 2 you will learn everything you need to know about sixteenth note bass grooves.

8th and 16th Note Bass Lines – Part 2 – Sixteenth Notes


Everything You Need to Know About Harmony on Bass Guitar

Everything you need to know about harmony on the bass 

Harmony is a lot simpler than most people think.

Like it or not the bass is a harmony instrument, bass lines have been around for centuries before the electric bass was invented and they’re the lowest harmony part. So Harmony and rhythm are our main functions as bass players. Rhythm is a much bigger and (in my opinion) much more interesting topic, but I wanted to make this video to show you exactly how simple harmony is.

Know the Chromatic Scale

The key to understanding harmony is first of all knowing that there are only 12 notes. Chromatic scale is simply a technical term for what you get when you play all 12 notes one after the other. If you’re not yet familiar with the chromatic scale, that is where you should start. It’s easier than learning the alphabet, there are more than twice as many letters in the alphabet than there are notes.

How Do You Avoid Playing Wrong Notes?

As bass players we usually play one note at a time. I know that you can play chords on the bass, I’ve made videos about it, but it isn’t our primary function. The term bass line implies one note at a time.

I am firmly of the opinion that there is no such thing as a wrong note. There are only 12 notes in total so if we start classifying some of these as wrong, we’re seriously limiting our options. There are inside notes and outside notes (I’ll explain these as I go on) and it’s our job as musicians to find ways of using them that makes sense musically.

Learn To Play Arpeggios!

So our job in terms of harmony is to choose which note out of the 12 we play at any one time. And the first thing that every bass player needs to know is chord tones or arpeggios. Arpeggio is just a classical term meaning all the notes of a chord played one at a time. Guitar players have chords and bass players have arpeggios. If you don’t know your arpeggios you will end up playing root notes all the time and your basslines will be boring.

How many notes in an arpeggio depends on the chord in question, but lets take an A7 chord for example. There are 4 notes (demonstrate). 4 out of 12. That’s already 1/3rd of all the notes and the chord tones are the strongest notes you can use in a harmonic situation.

What are Inside and Outside Notes?

Next is scale tones. Scales tend to have seven notes in them (not all I know, but standard major and minor scales and all their modes do). We’ve used four of them already in the arpeggio so there are three others that we can use as passing tones. These are the inside notes, notes that belong in the harmony. The remaining five notes that are not within the scale are the outside notes, you can think of these as chromatic passing notes.

So, Here’s Everything You Need to Know!

And that’s it, there are 12 notes, chord tones, scale tones and chromatic passing tones. It’s that simple. Your job is to learn what each of them sounds like, and the only way to do that is play them as much as you can. So cancel your application for that three year college course on advanced harmony and instead go forth and play your bass!

What Else is There?

Harmony and rhythm are the two biggest worlds in the language of music. And rhythm is much simpler than you might think as well, once you know how to sub-divide a beat into two, three and four. You know most of what you need to know about rhythm, but if you want more detail on rhythm you need to get my book Improve Your Groove. Here’s a link, https://geni.us/bassgroove

Enjoy!

Electric Bass – Improve Your Groove, Out Now!

My New Book Improve Your Groove is Here

3D Cover Image Improve Your Groove
Electric Bass – Improve Your Groove

Electric Bass – Improve Your Groove: The Essential Guide To Mastering Time and Feel on Bass Guitar

  • Crack the code of rhythm and groove
  • Develop incredible note placement and feel
  • Discover the secrets of syncopation
Order Improve Your Groove now via this link https://geni.us/bassgroove

When I started writing Electric Bass: Improve Your Groove in the summer of 2016, I set out to write a book to help bass players improve the most fundamental aspects of playing bass lines. Groove is exactly that. It’s the heart of what it is to be a bass player.

So I started by asking myself, what is groove? Can it be defined and more importantly, can you learn it?

Groove is a combination of many things, first and foremost time feel. To control the feel of your bass lines you must first have excellent timing. This involves firstly understanding rhythms and then having a system for playing them very accurately. So if you want to increase your rhythmic accuracy you must experience rhythmic sub-divisions when you play.

Therefore I decided to explain sub-divisions in the opening chapters of Improve Your Groove starting with the basics. Then I set out my system for improving rhythmic accuracy by using the sub-divisions.

Using Konnakol to Improve Your Groove

My system for experiencing sub-divisions involves first of all borrowing syllables from the ancient Indian system of vocalising rhythms called Konnakol. Which is sometimes called the ‘language of rhythm’. Using three simple sets of syllables from Konnakol you can very quickly learn to differentiate between eighth and sixteenth note grooves as well as triplets, shuffles and swing feels. As a result you will not only learn to differentiate each sub-division and time feel. You’ll also play them much more accurately by placing your notes on the sub-divisions

Finally, each time feel and sub-division is demonstrated using lots of Mp3 audio examples in a variety of styles. All the audio is downloadable for free from www.fundamental-changes.com.

Is there more to groove than great timing?

There certainly is. While timing is essential, there is more to being able to groove than just placing a note accurately onto a sub-division. Another huge aspect of groove is sharing your time feel with the musicians you play with. First of all you must know how to play with a drummer. There is no relationship in a band closer than the bass and drums, hence I’ve dedicated an entire section of the book to playing with drums. You must make the drummers sub-divisions your sub-divisions if you want the music to groove.

The Pieces

The final section of the book involves sharing a collective time feel in a group. For a performance to groove the whole group must groove and not just an individual. Therefore I’ve included five pieces with backing tracks to help you practise locking in with the collective feel.

In Conclusion

Groove is such a huge topic for bass players, so there will be more from me on the subject in the future. In my first book Electric Bass – Improve Your Groove I’ve laid out some approaches to rhythm and playing in a group that I believe will help any bass player to improve their groove.

“I hope that after reading this book you’ll start to think about time and rhythm in a different way and it will give you a deeper understanding of feel and groove and open up your playing to explore new musical cultures.”

I want to thank Joseph Alexander and Tim Pettingale at Fundamental Changes for publishing the book and making it look amazing.

Below is the product description from www.fundamental-changes.com

Improve Your Groove Cracks the Code of Rhythm, Groove and Feel on Electric Bass Guitar

Build your groove and play bass like a master

  • Discover how to groove flawlessly on electric bass in any style of music
  • Understand bass guitar rhythm and placement
  • Play in the pocket, every time.

Every bassist wants to play with great feel. It’s what ties a performance together, moves the music forward, and keeps it “in the pocket”. Therefore groove is what your audience wants to hear.

Electric Bass – Improve Your Groove is a complete course in rhythm  on bass. Groove is built by understanding rhythm, playing accurately and sharing that feel with other musicians.

What you’ll learn:

  • How to play in time on bass guitar
  • Learn to play “in the pocket” and create a tight, grooving performance
  • How to crack the code of rhythm
  • The secrets of syncopation and building your internal clock
  • The Konnakol vocal counting system to help you groove without thinking
  • 5 complete pieces with backing tracks that put theory into practice
  • Over 140 exercises and examples with FREE supporting audio to download

In Electric Bass – Improve your Groove, building perfect time and feel on bass is explained from absolute basics and teaches you how to play bass lines with great rhythm; from the simplest, to the most complex grooves.

You’ll discover grooving bass guitar rhythms and develop devastating accuracy and feel. Rock, Funk, Jazz, Blues and Latin feels on bass are all intimately addressed with over 140 examples and backing tracks.

Hear it!

Electric Bass – Improve Your Groove contains over 140 exercises and supporting audio examples so you can hear exactly how each exciting example should sound. Learn to lock in with the live backing tracks and dramatically boost your progress.

Buy it now and instantly become the bass guitar powerhouse of the band. https://geni.us/bassgroove


Warwick Thumb SC Fretless 6-String

Warwick Thumb SC Fretless

In this video, I’m jamming with myself at home using my fretless Warwick Thumb Single Cut 6-string bass guitar. I’m improvising on the spot and the bass is being played through my Warwick Hellborg Amplifier rig, including the Hellborg preamp.

Here’s a video I made with my Warwick Thumb SC Fretless, it’s such a beautiful sounding bass and I just love to play it.

Why Fretless?

I’m a jazz musician at heart, so I love fretless bass guitars. My Warwick Thumb SC is now the only fretless bass I own, for the simple reason that it’s so good there was no point in keeping any of the others I’d owned previously. I owned two fretless basses before I purchased my Thumb SC and I sold them both on eBay within months of it arriving.

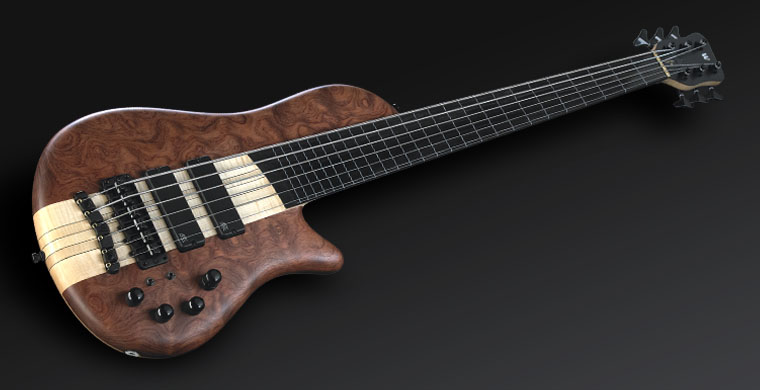
The tone of the bass is absolutely beautiful and the build quality and the quality of the wood are second to none. The body is made from Swamp Ash with a one inch Bubinga Pommele top. The neck is Flamed Maple and the fingerboard is Tigerstripe Ebony, which is a very hard wood, so even round wound strings won’t chew up the fingerboard.

It features full line inlays on the fretboard which is a custom shop option. All Warwick’s custom shop basses have their own page on their website. You can see mine by clicking on this link.

Johnny Cox’s Warwick Thumb SC 6

Why Fret Lines?

In my opinion, all fretless bass guitars should come with fret lines. I’ve never met anyone who has perfect intonation  without them. Really no one, and I’ve met many of the worlds best bassists. So, choosing not to have lines is just macho nonsense, there is no benefit to not having the lines. Jaco Pastorius had fret lines on his bass.

I’ve heard many people say, “double bass players don’t need lines on their fingerboards”. I know, and it’s not relevant because bass guitar necks are nothing like double bass necks. There are much more notes in a smaller space on a bass guitar neck which makes them almost impossible to hit accurately at high speed without markers. Also, double bass necks start narrow and get wider, so it’s much easier to feel where you are on the neck than it is on bass guitar.

In Conclusion

The Warwick Thumb SC is quite simply the best fretless bass I’ve ever played. In fact it’s the best bass I’ve ever played and that includes Fodera’s. It’s not cheap, but you get what you pay for. Don’t forget, if you want to go fretless, get the full line inlays.

Warwick Thumb SC fretless
Johnny Cox’s Warwick Thumb SC fretless


Warwick Artist Series Steve Bailey 6-String

Warwick Artist Series Steve Bailey 6-String

In this video I’m playing the composition Raju by John Mclaughlin and a vehicle for demonstrating my Warwick Artist Series Steve Bailey 6-String bass guitar.

Some of you will know that I’ve installed a Roland GK-3B divided pickup onto my Warwick Artist Series Steve Bailey 6-String bass. Most of my demo videos featuring this bass use the GK-3B and a Roland GR-55 guitar synth pedal.

I decided to make this video because I wanted to show what the bass sounds like without the Roland GR-55. In this video, I’m not using the GK-3B pickup at all, and you are hearing the bass exactly as it sounds coming out of the factory.

How is the quality of the Warwick Artist Series Steve Bailey 6-String?

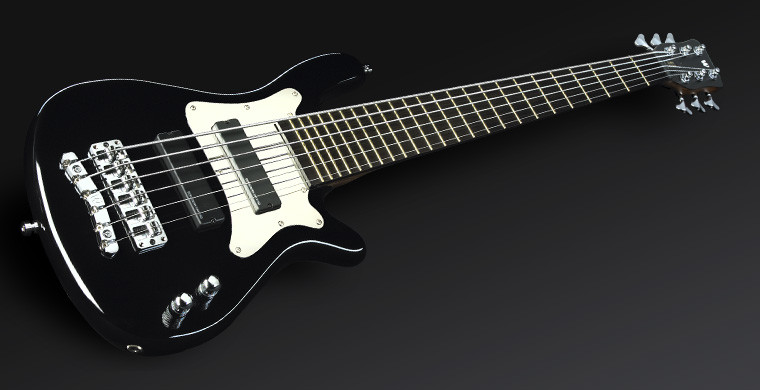
Excellent, and as usual, Warwick’s commitment to using high quality and resonant wood to build their basses shines through. The bass has an Ovangkol neck with Ekanga veneer stripes and a Tigerstripe Ebony fingerboard. The body is made from Swamp Ash.

The shape of the bass is that of a Warwick Streamer Bass but Steve Bailey has slightly extended the cutaway to give better access to the upper frets. This is a good edition, you can see from the video that I like to play in the upper register which is why I choose this bass over the standard Streamer shape.

Another input from Steve Bailey is the electronics. The Warwick Artist Series Steve Bailey 6-String features active Seymour Duncan Soapbar pickups. The onboard preamp is Seymor Duncan Steve Bailey Active 2-way electronics.

Steve Bailey’s final input on his Artist Series bass is the fact that the standard model is fretless, however I’ve got the fretted version, because as good as this bass is, there’s no way that it’s as good as my fretless Thumb SC, check out my posts for that bass if you haven’t already.

Warwick Thumb SC Fretless with Warwick Hellborg Rig

In Conclusion

The Warwick Artist Series Steve Bailey 6-String is a high quality professional instrument. It has become a real work horse for me because I now use it for most of my gigs. So, that should tell you how good it is given the quality instruments I have at my disposal. The fretless version may not be in the same class as the Warwick Thumb SC. However at less than half the price of the Thumb SC, you can’t go wrong.

Warwick Artist Series Steve Bailey 6-String


Johnny Cox and Arun Maheswaran Jazz and Carnatic Music

Arun Maheswaran with Johnny Cox Mixing Jazz and Carnatic Music

In this video, Carnatic musician Arun Maheswaran is playing Mridangam and jazz musician Johnny Cox is playing his fretless Warwick Thumb SC 6-string bass guitar. Carnatic music is South Indian classical music. We’re playing a composition called Chasing Shadows by Anoushka Shankar.

Can You Mix Jazz and Carnatic Music?

Arun Maheswaran thinks you can. Arun studied Mridangam under his guru Shri K Anandandesan from the age of 10. In addition to performing and teaching the Mridangam, Arun also played the Ghatam and Udu Utar.

Recently Arun invited me to join his band Cosmic Rhythms. Which beautifully mixes Carnatic and jazz music. So, we took some time at a rehearsal to shoot this video together.

It’s been quite an education for me learning about Carnatic music. I’ve had to learn Korvai’s. A Korvai is a rhythmic phrase repeated three times in unison, each time the sub-divisions get smaller giving the impression of getting faster. Therefore, the Thalam or rhythmic structure doesn’t change. Also, Korvai’s are usually played at the end of solos or the final end of a piece.

A Koraipu is a call and response section, and as the Koraipu continues the phrases get shorter. Koraipu literally means reducing.

Why a fretless bass

The fretless bass is essential for combining Jazz and Carnatic music. The ability to bend pitches and slide between notes is essential to the phrasing in both jazz and Carnatic music. I’ve posted plenty of times about my fretless Warwick Thumb SC. I honestly believe that there isn’t a better fretless bass on the planet.


Godin ACS Slim Played Solo Fingerstyle

Using the Godin ACS Slim for Solo Fingerstyle performances

I made this video to demonstrate playing my Godin ACS Slim guitar solo fingerstyle. I think the ACS Slim works particularly well for playing solo fingerstyle. The guitar has two different inputs, one for a standard guitar jack cable and the other for a 13-pin midi cable. This second input allows the Godin ACS Slim to be used with Roland guitar synth pedals. In the video I’ve demonstrated both inputs.

Here’s another demo I’ve made with my Godin ACS Slim.

I made this video to demonstrate the versatility of the Godin ACS slim. In doing so I’ve done something I very rarely do. I’ve made a video of myself playing other peoples compositions. All my previous videos have contained 100% original material. But in this video, I tackle some solo fingerstyle arrangements of tunes by musicians as diverse as Sting, Stephen Sondheim, Mike Stern, Coldplay and Norah Jones. My reason for doing this is to demonstrate the styles that I think the Godin ACS Slim is ideally suited to playing and how brilliant the Godin ACS Slim is as a solo fingerstyle instrument.

What are the strengths of the Godin ACS Slim?

In my previous video I demonstrated the guitar in both a solo context and as part of a group. Here I wanted to really show off what I feel is a big strength of the Godin ACS Slim which is as a completely solo instrument capable of playing fingerstyle chords, melodies and bass lines simultaneously with no overdubs or accompaniments.

The vast majority of this video features just the sound of the nylon strings. Unadulterated by effects or MIDI sounds. It was recorded using the standard guitar jack output only.

The one exception to this is on the Norah Jones tune Don’t Know Why where I have featured the synth access using a Roland GR-55 pedal. In this case it is to demonstrate a capability which I did not demonstrate in my previous video which is that of changing the tuning on the guitar without retuning the strings. On this particular tune I had the guitar tuned in standard tuning but the sound you are hearing is that of Pat Metheny’s take on the Nashville tuning with the 1st, 2nd, 5th and 6th strings tuned down a 5th and the 3rd and 4th strings tuned up a 4th.

Once again I have to stress that the retuning was entirely electronic and done with the 13-pin synth output connected to a Roland GR-55. Have a listen to Don’t Know Why it starts at about 3 mins 30 secs into the video. You wouldn’t guess that the notes you are hearing are not the same notes that came from the guitar strings. Whatever your personal feelings are about synth access guitars you have to admit that the technology is amazing.

About the Godin ACS Slim

The dimensions of the guitar are similar to that of a standard electric guitar. The scale length is 25 1/2 inches and the width at the nut is close to 1.7 inches. Which gives it a much narrower string spacing than on acoustic nylon string classical guitars. The advantage of this is that if you’re used to playing steel string guitars but you want a guitar with a nylon string sound. Then the Godin ACS Slim gives you the sound of an amplified nylon string classical guitar. But feels much more like an electric guitar to play. The dimensions of the “Slim” body and fingerboard radius also generate the feeling of holding an electric guitar. But the Godin ACS Slim is still light because the body is chambered rather than solid like a standard electric guitar.

The electronics

The Godin ACS Slim has two inputs. One jack input for a standard guitar cable, and the second input is a 13-pin connector for synth access. I know not everybody is a fan of using guitars to trigger MIDI sounds. And if that’s you then you should think about getting one of Godin’s other multiac guitars without synth accessibility. But for those of you who are interested in the synth access then the Godin ACS Slim is outstanding.

The custom RMC electronics that are installed in the bridge not only give fantastic sound quality when amplifying the nylon strings, they also provide outstanding responsiveness when using the guitar as a synth controller. If there is any latency when triggering synth sounds then it is so small that it is undetectable and hopefully the video I’ve made can give a very small example of what the Godin ACS Slim is capable of when plugged into a Roland GR-55 guitar synth.

Not an acoustic guitar

One word of caution I must add is that this is an electric guitar and it does not function un-amplified. When you play it acoustically, it doesn’t make any more sound than an un-amplified solid bodied electric guitar. So, you must use it with amplification.

I feel that while this guitar is extremely versatile and works well for virtually all styles of music. I’m personally not a fan of using it to play classical music. This will come as a surprise to some because nylon string guitars are usually classical guitars. But there’s something about amplifying the Godin ACS Slim that just doesn’t quite sound right for classical music. For me the Godin ACS Slim comes into it’s own for jazz, pop and most contemporary styles of music both playing solo and in a band. But for classical I would always prefer to play an acoustic classical guitar and use a good quality microphone for amplification if needed.

The pieces I’ve performed here in this video are as follows:
  1. Viva La Vida – Coldplay
  2. I Know You – Mike Stern
  3. This Time – Earl Klugh
  4. Don’t Know Why – Norah Jones (arr. Pat Metheny)
  5. Send In the Clowns – Stephen Sondheim
  6. Shape of My Heart – Sting and Dominic Miller

Godin ACS Slim Demo

Godin ACS Slim

I made this video to demonstrate my Godin ACS Slim guitar. The guitar has two different inputs, one for a standard guitar jack cable and the other for a 13-pin midi cable. This second input allows the Godin ACS Slim to be used with Roland guitar synth pedals. In the video I’ve demonstrated both inputs.

Here’s a quick demo I made with my Godin ACS Slim. It’s a brilliant guitar, with a great natural nylon string sound and synth access.

The dimensions of the guitar are similar to that of a standard electric guitar. The scale length is 25 1/2 inches and the width at the nut is close to 1.7 inches which gives it a much narrower string spacing than on acoustic nylon string classical guitars. The advantage of this is that if you are used to playing steel string guitars (which most of us are) but you want a guitar with a nylon string sound then the Godin ACS Slim gives you the sound of an amplified nylon string classical guitar but feels much more like an electric guitar to play. The dimensions of the “Slim” body and fingerboard radius also generate the feeling of holding an electric guitar but the Godin ACS Slim is still light because the body is chambered rather than solid like a standard electric guitar.

Two Inputs

The Godin ACS Slim has two inputs, one jack input for a standard guitar cable and the second input is a 13-pin connector for synth access. I know not everybody is a fan of using guitars to trigger MIDI sounds and if that’s you then you should think about getting one of Godin’s other multiac guitars without synth accessibility. But for those of you who are interested in the synth access then the Godin ACS Slim is outstanding.

The custom RMC electronics that are installed in the bridge not only give fantastic sound quality when amplifying the nylon strings. They also provide outstanding responsiveness when using the guitar as a synth controller. If there is any latency when triggering synth sounds then it is so small that it’s undetectable. Hopefully the video I’ve made can give a very small example of what the Godin ACS Slim is capable of when plugged into a Roland GR-55 guitar synth.

Does it work as an acoustic guitar?

One word of caution I must add is please be aware that this is an electric guitar. It does not function un-amplified. If played acoustically it doesn’t make any more sound than an un-amplified electric guitar. So, it must be used with amplification.

I feel that while this guitar is extremely versatile and works well for virtually all styles of music. I’m personally not a fan of using it to play classical music. This will come as a surprise to some because nylon string guitars are usually classical guitars. However, there is something about amplifying the Godin ACS Slim that just doesn’t quite sound right for classical music. For me the Godin ACS Slim comes into it’s own for jazz, pop and most contemporary styles of music. Both playing solo and in a band. However, for classical I would always prefer to play an acoustic classical guitar and use a good quality microphone for amplification if needed.

In the video I start by demonstrating the sound of the nylon strings using the piezo pickups in the bridge. Then in the second half of the video I add the synth sounds with a Roland GR-55 synth pedal.

Check out my other video demo of the Godin ACS Slim here.

Creative Bass Playing Blog