Tag Archives: how to restore a bass guitar

Vester P Bass Demo With Fender Pickup – Bass Practice Diary 105

Fender Custom 62 Precision Bass Pickup on Vester P Bass Demo – Bass Practice Diary – 28th April 2020

This is a quick demo I recorded this week for my Vester P Bass (Vester Stage Series). The bass sound is completely unedited. I wanted to try and give you the clearest idea of what the bass sounds like now that I’ve installed a Fender Custom 62 Precision bass pickup. The bass was recorded directly from the line out of my Markbass Little Mark III. All the EQ on the amp was set flat. I did no editing after recording and I didn’t add any EQ, effects, compression or anything else.

Last week I ripped all of the rusty old electronics out of this 26 year-old bass and I installed a new Fender Custom 62 Precision bass pickup on it. This week I’ve been playing this bass, the first bass I ever owned, for the first time in about 20 years. It’s bought back all kinds of memories of my childhood. And I’ve found myself remembering things that I used to try and play in those early days of learning to play the bass. That’s why I’ve recorded a shuffle blues here, because my abiding memory of this bass is playing shuffle 12-bar blues when I was 11, 12 & 13 years of age.

My First Childhood Bass

It’s funny, this was the first bass I ever owned, but it’s entirely different to any of the other basses that I’ve owned since. I’ve never owned a Fender Precision (or Squier) and I currently don’t own another bass that has a P style pickup on it. It’s also the only bass that I’ve ever owned that has a maple fretboard.

It’s easy to look back at your first instrument with a kind of misty eyed nostalgia, but the truth is, for me, this bass unconsciously became a kind of blueprint for how I didn’t want my future basses to be. Thinking back to my first ever bass teacher, he played a proper Fender USA made Jazz Bass. My Vester suffered in comparison, and I’m sure that unconsciously coloured my opinions of J and P style basses ever after. Later in my teens, as I started to hear modern style active basses like Warwicks. They became my blueprint for what I thought a great bass tone should be, and I moved further away from P style basses.

I remember that the electronics stopped working when I was in my late teens. I did try to get them working again, with some initial success. By that point, I already owned a newer 5-string bass. And when the electronics stopped working a second time, I didn’t have the money or the expertise to fix it. So, for about 20 years, the Vester Stage Series P Bass sat unused in a flight case in the loft. Only coming out when I moved house, or I needed the flight case to take a different bass on tour.

Vester Stage Series P Bass

What I didn’t appreciate as a child, is that there’s actually some really good things about this bass. The best thing about this bass, by far, is the neck. It’s a really good playable maple neck. I entirely failed to appreciate this as a child because I didn’t have enough experience of playing bass necks. The original bridge on the Vester is also an excellent copy of vintage style Fender P Bass Bridge. It’s still on the bass and in perfect working order, as are the Fender style tuners. It was such a good copy of a Fender P bass that Fender successfully sued them. The basses were no longer manufactured after that.

The biggest problem with the bass originally was that it wasn’t very inspiring to listen to. If only I’d known in the 90’s how easy it is to change the pickup on a P style bass.

Installing a Fender Custom 62 Precision Bass Pickup

Installing the Fender Custom 62 pickup couldn’t have been easier. It was actually much harder to get the old pickup out than it was to put the new pickup in. The screws holding the old pickup in place were so rusty that the screw heads had virtually disintegrated. Meaning that unscrewing them was impossible. I had to break the old pickups to remove them, and then remove the old screws with pliers.

Putting in the new pickup was as simple as, finding the position of the pickups using the old scratchplate, making new holes for the four screws and then soldering two wires. The Fender Custom 62 Pickup comes with a white wire and a black wire. And a diagram showing you where to solder them.

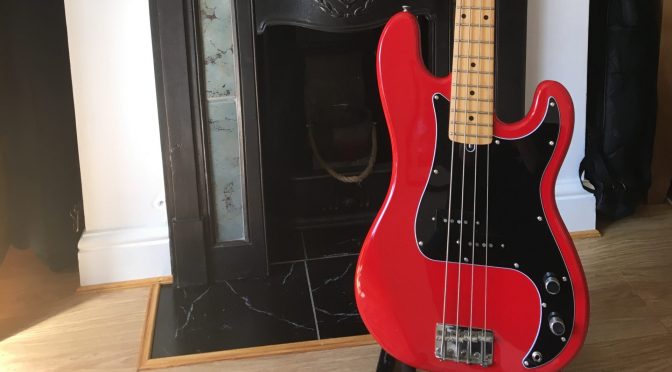
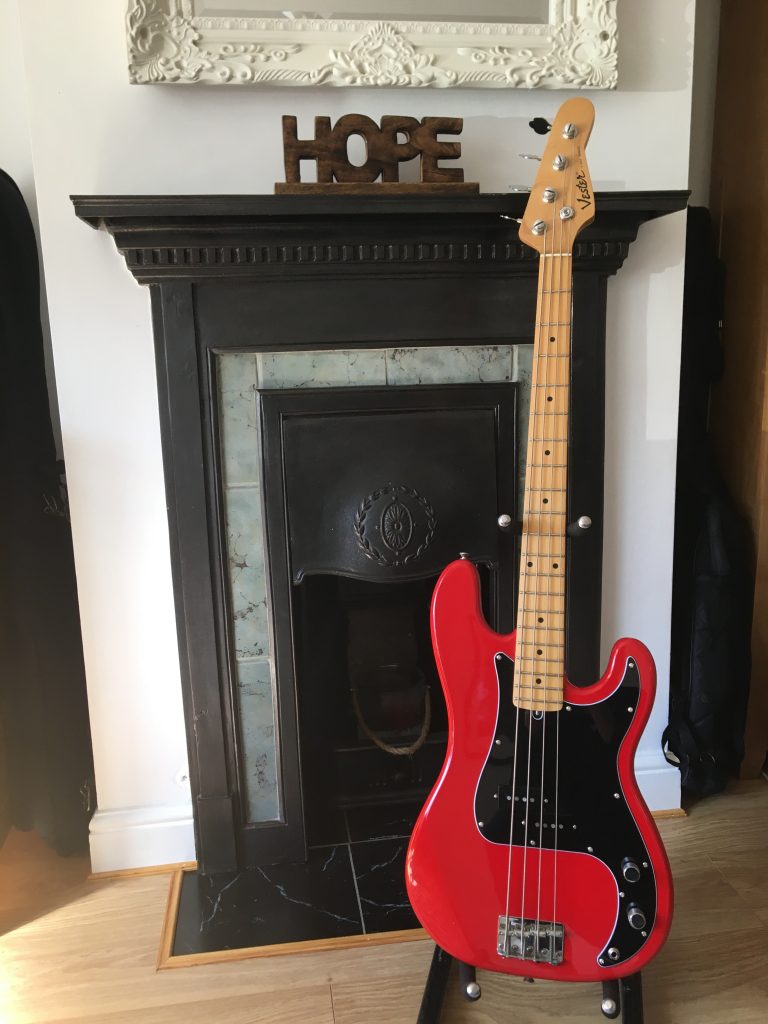
Apart from installing the pickup, the other work I did included changing all of the wiring, pots and input, cleaning and polishing the frets and the fretboard and installing a new scratchplate with access to the truss-rod. The video was shot just before the new scratchplate arrived, so here’s a picture of the finished bass.

P Bass Demo
Vester Stage Series P Bass with Fender Custom ’62 Precision Bass Pickup

The Guitar Solo

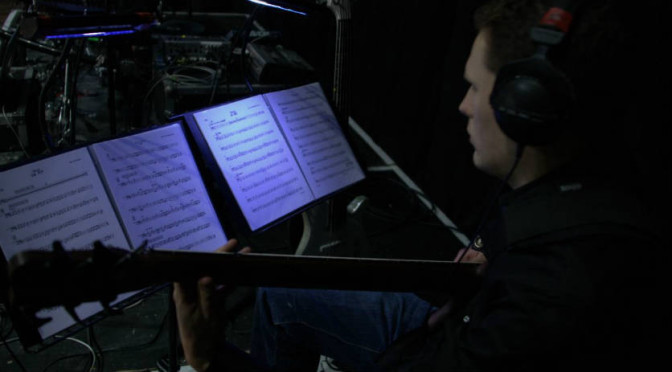
The guitar solo in the video is part of a transcription I’ve been working on this week from Frank Gambale. Here is a PDF of the transcription with guitar TAB.

Can a Fender Custom ’62 P Bass Pickup Make a Cheap Bass Sound Great? – Bass Practice Diary 104

Can a Cheap Bass Sound Great by Adding a Good Pickup (Fender Custom ’62 P Bass Pickup)? – Bass Practice Diary – 21st April 2020

Can you get a good P Bass tone out of a cheap bass with the addition of a good pickup? This week I’m doing something a bit different. I’m bringing a bass back to life that hasn’t worked for somewhere in the region of 15-20 years. I’m literally changing all of the electronics, including the pickup, jack input and volume and tone pots as well as all the wiring. But the star of this is the Fender Custom Shop Custom ’62 Precision Bass pickup.

Vester Stage Series P Bass Copy

The bass in question is the first bass I ever owned. It’s a Korean made P Bass copy called a Vester Stage Series. My parents bought it for me in 1994 and it cost £150 when it was brand new. It’s actually quite a good copy of a Fender Precision. So good in fact that they were successfully sued by Fender in the 90’s and as a result, these basses didn’t last long.

There’s a lot on this bass that feels cheap. The original pickups are uninspiring sounding. The body is plywood, the scratchplate is cheap and flimsy and all the screws have gone rusty. But the main reason I say that it’s a good copy, is because the neck is really good. It’s very playable and it’s really in good shape for a cheap 26 year old bass. Other elements on the bass which are good are the tuners and the bridge. So there is the shell of a good bass, especially when you consider that the pickups, scratchplate and screws are all easy to replace. Would a solid wood body lead to a better tone than the plywood body? Probably a bit, but I personally don’t think that it would make a massive difference.

The Transformation

As I’ve already mentioned, the neck, bridge and tuners are in remarkably good shape for a cheap bass of this age, but the frets needed attention. So the first job, having removed the old strings was to clean the frets. A great trick for doing this is using 0000 grade wire wool. I would strongly recommend using electrical tape to protect the fretboard. You can get tools that go over the frets to protect the board, I have the tools but I don’t find that they work better than tape. In fact, I’ve found I can be more accurate with tape.

After cleaning the frets with wire wool, I polished them with Frine Fret Polishing Kit and I cleaned the fretboard with a normal guitar polish. I would normally use lemon oil but I wouldn’t recommend using lemon oil on a maple fingerboard.

Next I had to remove the scratchplate and the bridge. The bridge had to come off so I could remove the earth wire that runs through the body of the bass and attaches to the tone control pot. Having done that, the old input and volume and tone control pots were easy to remove. The old pickups were not easy to remove. The heads of the screws holding the old pickups in place were so rusted that no screw driver could turn them. It was very difficult getting the pickups out, I eventually had to break the old pickups to get the out of the bass and then get the screws out with pliers.

Installing the Fender Custom ’62 P Bass Pickup

By contrast, installing the new Fender Custom ’62 P Bass pickup couldn’t have been easier. I lined up the position by placing the old scratchplate in place. I made four new holes for the screws and then I fixed the pickup in place and soldered the two wires according to the instructions that came with the Fender Custom ’62 pickup. You really don’t need to be an electrician or even a DIY expert to do this. P style basses are really very simple to wire up.

If you want to do a similar transformation to your own P bass, you don’t need to change the pots or the input as I did. I changed mine because lots of the wires were rusty, which was why the bass didn’t work. And it’s cheap and easy to buy ready wired input, volume and tone setups from guitar shops. The only fiddley job is connecting the earth wire from the bridge to the tone control pot.

To complete the installation of the pickup, I would strongly recommend setting the pickup height individually for each string. This is to ensure that you get an even sound across each string. I set my pickup heights by measuring with a metal ruler and then adjusting the heights by either tightening or loosening the four screws. The measurements I was aiming for were E – 3.9mm, A – 3.8mm, D – 3.7mm and G – 3.6mm. Although I wasn’t trying to be too specific, I don’t think my measurements were perfectly accurate. Those measurements were just a guide to get the heights roughly right, and the rest is done by playing and listening.

How to Set up a Bass

If you’d like to learn the basics of setting up a bass, then check out this video.